Search This Blog

Wednesday, August 1, 2018

Spun cotton Christmas ornaments


I've been working on updating my Christmas decorations to go with a theme I'm considering for my tree this year. Yes, I know it:s way too early but I have to craft when I can! I thought I'd go with a woodlands-enchanted forest look and want to increase the number of fun and festive animals in the tree. My younger grandchild will be entering elementary school soon so I hope I can finally pack away the toddler-proof ornaments and start bringing out more things of fragile beauty. While searching pages on eBay for "new to me" ornaments that I just can't find locally in Japan, I kept coming across pricey antique spun cotton decorations. They really weren't catching my eye as something I could afford or feel comfortable owning, though. My decorations do have a folk art vibe though and I found way too many choices as I looked online. Eventually, that caused my husband to start wondering why the postman and parcel post delivery truck were coming to our house so often!

While exploring handmade options, I remembered that I have some off-colored felt leftover from my own kids play days. I wondered about using that for some soft animals for the lower branches of the tree. You know that spot where exploring fingers won't matter too much. I, also, started to wonder if it was possible to changed the felt color with things I had around the house. Yes, apparently, you can do that with food coloring and vinegar, rather like you can dye Easter eggs! Then, I stumbled upon some Pinterest pages that outlined how to make spun cotton decorations.

Eventually, I found some really clear directions on this page: http://belsnickle.blogspot.com/2014/08/sculpt-cotton-batting-deer.html  As I made an owl first and then a fox, I obviously didn't follow the directions religiously as these directions are for a deer. They were a very helpful basis on how to get started, though! I haven't really wanted to start buying pricey new art supplies to replenish what we have at home. Instead, I worked with what was on hand.

1. unbleached cotton quilt batting
(I had some scraps left over from a quilt I made several years back and swore I'd never use cotton batting again as it was so hard to get the tiny quilting needle through it!)
2. newspaper
3. toilet paper roll
4. masking tape
5. regular white glue
6. wire (for the fox legs)
7. watercolor (standard kid stuff quality)
8. marker for some detailing
9. hair spray

Didn't have to buy anything!


 The owl was my first creation and it came together much easier than I imagined. I cut a toilet paper roll in half and stuffed some newspaper in it to create a sense of a head and a body by a bit of bending, creasing, and general sculpting. I figured an owl would be an easy first try as the body shape is so simple. Masking tape came in handy to hold the general outline shape in place. My fingers could stuff up into the roll to hold things as I worked. Eventually, I will use the crevice to anchor the owl to a Christmas tree branch. Not really knowing how to approach things I used a biggish piece of the batting and glue and did the whole thing in one fell swoop -- head, body, and the 2 wings. Later, I went back and with a bit more batting I puffed up the chest and built the legs. I used brown and black markers to define the head colors and eyes. Then, brown watercolor to add in the rest of the color. Finally, I used hair spray as a fixative for the colors.

Next, I made the fox. Realizing that one big piece of batting wasn't the most refined approach, I used much smaller strips and pieces. Newspaper and masking tape were used for the head and basic torso shaping. Once the head and torso were completed with batting and glue, I threaded in a piece of wire for the front legs. Those were delicately covered in batting and glue. Then, a tail and back legs were done with just batting and glue. Again, black marker was used for some delicate bits of color and brown and black watercolor for the other parts. Hair spray was used to seal the colors.


I was amazed that each animal only took about a day to do from start to finish. Time was needed for the glue and water colors to dry between applications so these hot days did serve a purpose beside causing me to have my own personal sweat factory going on. All in all, I found this craft easier than paper mache' or paper clay. Tactically, the cotton has a nice feel, looks a bit furry or feathery, and was easy to mold. Give it a try!


Monday, May 28, 2018

Paper Clay Santa!


Several years back, I was experimenting with paper clay and created several snowflake Christmas ornaments. Some I gave a coat of varnish to as a finishing touch and others I didn't. With the final bit of clay left in the package, I hand modeled a Santa face.


For several years, it sat untouched in the box with the snowflakes as one of those ideas that never resulted in a finished project. But, while on a roll with making some Christmas ornaments, I took a new look at it. I got out the water color kit and gave it some color. Then, I gave it a coat of Mod Podge for some stability as I found the paper clay snowflakes that didn't get a final varnish did start to crumble after a few years. Also, water color does need something to make the colorfast. 

As the eye sockets were just indentations, I did build them up into eyes with a bit of paper-mache' technique. Then, with the help of a felt tip marker to do some delicate details it was done. One last coat of Mod Podge finished it off. 

I thought it was cute, but the grand-kids vetoed it from the Christmas tree last Christmas. Oh well, maybe they'll like it this year or next. Maybe it was too much of a reminder that Santa's eyes were on them!

Sunday, May 27, 2018

Wood Cut Decoupage Christmas Ornaments

Decoupage Wood Slices make great Christmas tree ornaments!


Last Christmas I decided to organize a handmade Christmas ornament exchange with a group. Before the exchange deadline came due, I tried out several ideas and finally found the one I liked the best. It was decoupage wood slices! They were so fun to make that I made oodles of them -- enough for the exchange, enough for some special gifts to friends, and more than enough for my own Christmas tree. They won't break and were ever so cute so I wanted to make sure that my grand-kids would have plenty to put on the tree wherever they liked. 


 I found wood slices at a local 100 Yen Shop (like a dollar store). I tried to get the ones that had interesting bark -- some appeared to be birch, some had really curly bark, and all had a nice natural look. Others were round and had a light exterior wood and a dark inner core. None of them were pre-drilled with a hole for ribbon or string, though. They were a bit too small for that anyway. I was able to find several cut at an angle, which also gave them a nice look and made me nostalgic for the bigger wood sliced decoupaged pictures that people like my grandma had hanging on their walls when I was a kid.

The decoupage method is fairly easy once you get the hang of it. For most of them, I sized a print according to the size of the wood slice and color copied it. As there are no art supplies shops near me, I used hair spray as a fixative so the colors wouldn't run once I started to decoupage. For a few of them, I used some old wildlife stamps that my mother had affixed to a box she sent me many decades ago. The stamps were starting to peel off and I was planning to get rid of the box anyway so I rescued the stamps and used them in this project.

I found that gently tearing the paper, rather than cutting, gave the most natural edges to the print and made it blend in nicely with the wood slice.

Next, on to decoupaging. Back when I first learned how to decoupage in the 1970s, I used varnish. But, a couple of years back I learned about Mod Podge. It is easy to work with. So, I Mod Podged the print onto the wood slice. Waited for it to dry before moving on to adding the layers of Mod Podge. Depending on how quickly things dry and how many and heavy the coats are layered on, that step might finish in a day or two or maybe even several days will be needed.

Without a pre-drilled hole to hang the wood slices from, I found that ribbon tied and glued to the back worked fine. Finally, I used washi paper to cover over the backside with the exposed ribbon and Mod Podged that too.

My biggest challenge was that my local 100 Yen Shop kept running out of wood slices and ribbons that were suitable for the project!


Christmas decorations -- Making a dangerous ornament safe


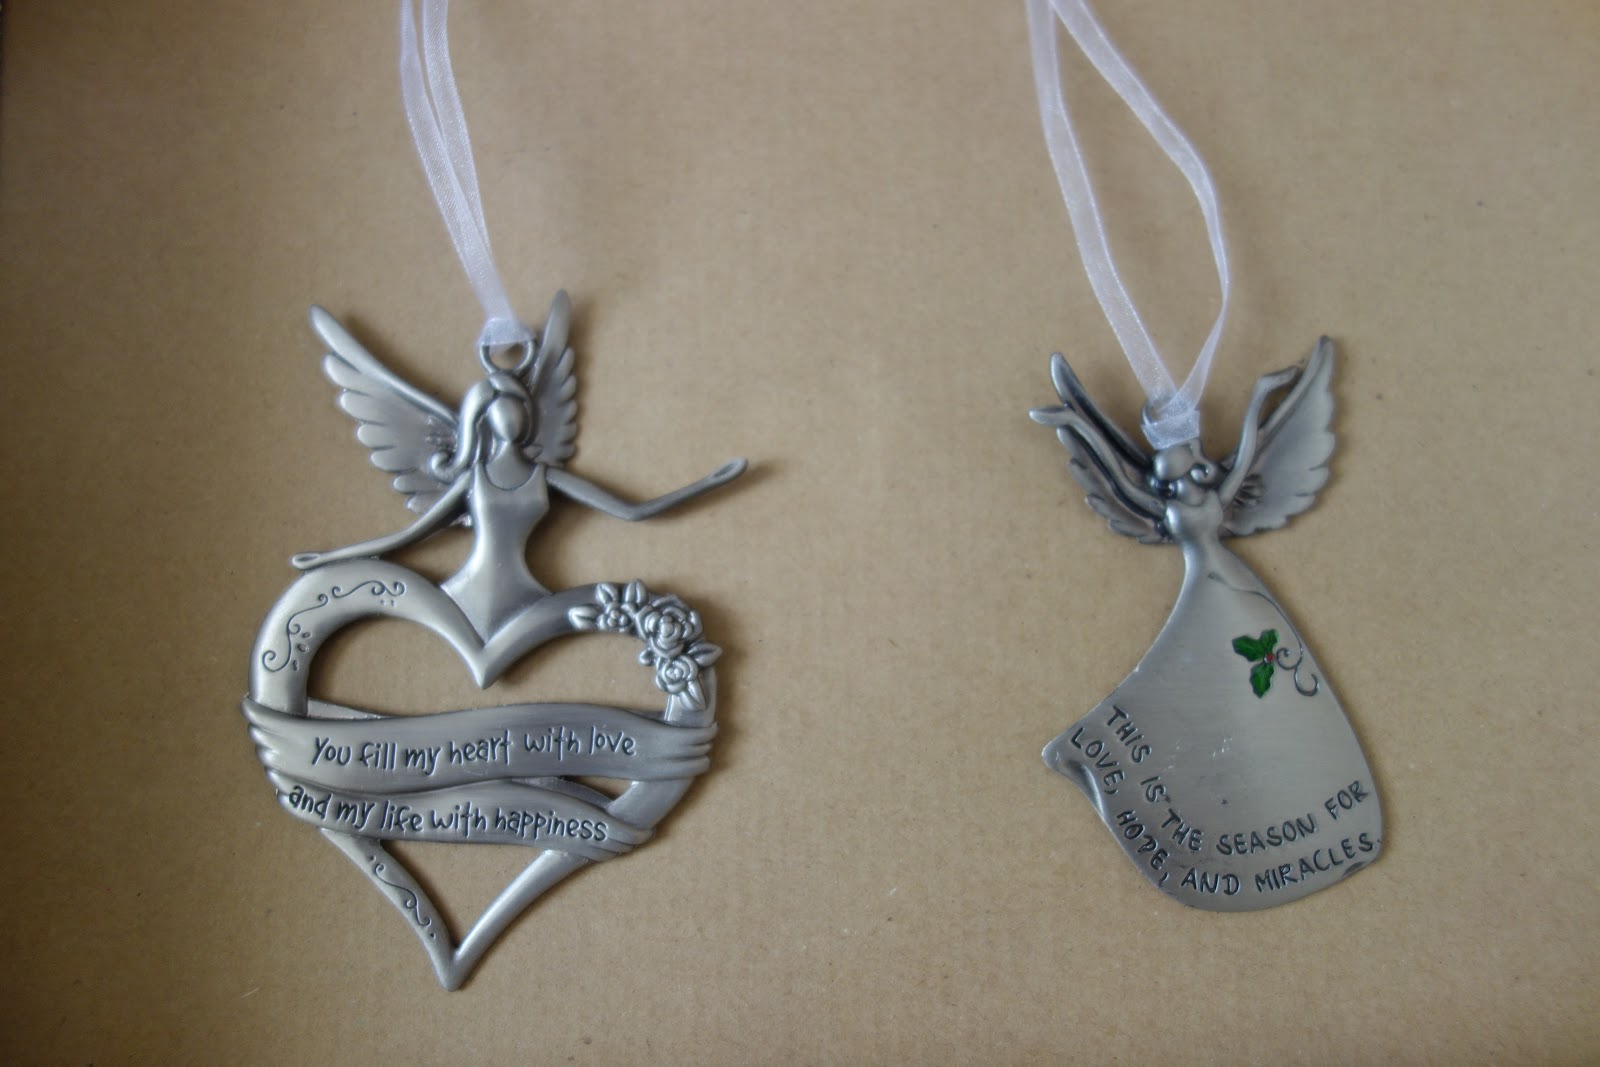
I bought something second-hand at an online auction last winter and only some months later, when I was breaking down boxes for recycling, did I discover that the seller had included a couple of freebies in the package. What cute little Christmas angels, I first thought. My second thought was, that those sharp metal upturned arms and wings could poke an eye out!!! Ah, now I understand the freebie as the first owner probably had the same thoughts after purchase and wanted those out of their house and away from their own kids!

So, here is what I did with them, I took the outer parts of ribbon rolls and with a piece of reddish colored mesh, glued them together to form a stiff sturdy base. Then, I Mod Podged both sides for added thickness. Once dried, I glued each ornament onto  the base. 

Behold a red glow through the center when the light shines and the arms and wings are no longer lethal weapons!

Christmas decorations -- Updating a tacky plastic onion shape


I know, I know, Christmas is months and months away so I should be thinking about other things. But, that's just it, when the season rolls around again, I probably will get so busy yet again . Then, once again, I will have trouble finding the time to take care of jobs like sorting through my boxes and boxes of Christmas decorations and finding those that need some time spent on making repairs. It's just so much more fun to get the tree up and immediately start to decorate it! So, while digging out the summer fans in the storage closet, and before it gets too sweltering hot, I also decided to pull out the boxes of Christmas decorations and do a bit of re-organizing. I was aiming for finding the ones that need a bit of work on them and thinning out those that don't quite match the woodsy-foresty theme I'll be going for next Christmas, especially if they were being used more for their child-friendly unbreakable aspects than anything else. By next Christmas, at nearly 6 and 9, the grand-kids will hopefully be old enough to enjoy a few more fragile things on the tree without too great of a temptation... Hmm.... We'll see how that goes, but that's the hope for now.

Now that the Christmas tree no longer needs to be quarantined off into the coldest upstairs room, away from toddlers, last year I packed away all of the snowmen and most of the snowflake ornaments that I'd been collecting and using for a few decades. Our backyard Japanese maple trees have matured to the point that they are the focus of attention when the leaves turn and the Christmas tree will now return to the living room to sit in front of the outdoor view! But, our climate is such that from Thanksgiving up to Christmas, our autumn leaves are at their peak and with the stunning reds and orange hues, snowmen just seemed silly. So, I invested in some new decorations and created many more that should be unbreakable and embrace what's actually happening in our local climate during the holiday season. For starters, I bought a new tree topper. It's a Gisela Graham creation and just is so delicate and charming! It looks perfect with the outdoors scenery.


Anyway, in the process of re-organizing, I came across this 3-pack of plastic onion-shaped bulbs. Festive holiday colors, right? Ah, but the "gold" was just so brassy and CHEAP looking up close. It clashed with everything hanging around it. In places, the paint was scratched and chipping off too. So, I did an experiment and gave them a watercolor paint job of orange-yellow; then a layer of Mod Podge; next a layer of varnish which dried a bit sticky; so finally another layer of matte Mod Podge. I tried out a new top to the ornaments with shabby red ribbon but ended up picking it off later after it had dried. The look of these 3 ornaments is softer, with a nod toward autumn, and hopefully it will work with the other things on the tree when the season rolls around again.


One with the first coat of orangy-yellow watercolor and one as it originally was.


Finally, dried and ready for repacking until Christmas!

Saturday, July 9, 2016

My heart's In It


 I have a Japanese in-law who keeps gifting me gigantic boxes of cast-off clothes. She's convinced I can turn anything into a quilt. Her confidence is a bit over zealous, though. Nope, flimsy, transparent, polyester dresses or  the like just don't make good quilting material! 

But, I did discover this front and back to something that was never completed inside her most recent box of stuff. It was way too small for me but I wondered if it could be turned into an apron for my granddaughters...      


I stitched together the 2 fabric pieces and gave it armholes, an easy open neckline, and a hem. It was blah looking, though.  The armholes seemed overly large, too.
       I decided to add on a pocket and some tie-strings. The box held some red fabric and I looked through my fabric stash and decided that I might finally be able to use the animal print piece of fabric I'd purchased some years ago.


Voila!

Granddaughter loved the piece so much she wanted to wear it as a dress!


Friday, July 8, 2016

Baking cake!


 Do you know what the most popular cake of the 1970s was in the USA? It just has to have been the Bundt cake, of course! Before that, when I was a kid during the late 1950s and all during the 1960s, my mother would spend ages whipping egg whites for Angel Food cake. Those were ever so difficult as they could collapse just from closing the oven door when peeking on their progress. They needed a special long pronged fork sort of gizmo to gently cut and they needed a special tubed pan to bake and then overturn to cool. I was never fond of Angel's Food cake.

Then, for New Year's Eve to welcome in 1976, my mother clipped a recipe for Sherry Cake and baked it. Oh my, was it wonderful! It was absolutely the best cake my mother ever baked. Browned and shaped to perfection, it was soft, fragrant, and absolutely delicious and she even sent the leftovers back with me to college after winter break. I got the recipe from her and have been baking it just about every holiday season ever since -- or at least since I got my own kitchen and fluted pan. Since I'm in Japan and things like yellow cake mixes, vanilla pudding, and lemon gelatin aren't generally sold here, I have had to get creative some years if I don't have any of those things stocked away in my cupboard from trips home. Somehow I've never had a miss with this recipe even with various changes to the recipe. 


******************************

Sherry Cake:

1 large package yellow cake mix
1 package vanilla pudding or 1 package lemon gelatin
3/4 cup salad oil
3/4 cup sherry
4 eggs
1 teaspoon nutmeg
1 teaspoon vanilla
1 teaspoon almond flavoring

Mix all ingredients together and beat for 4 minutes. Pour into greased tube of Bundt pan. Bake at 350 F (180 C) for 45 to 50 minutes or until done. Dust with powder sugar.

**********************

The last few winters when I got out my fluted cake pan, I looked at how sad it had become. The non-stick surface certainly didn't look healthy. I'm thinking about that kind of stuff more these days as I frequently cook for my 2 young granddaughters now and I don't want nasty stuff leaching into anything they eat. I covered it with cooking paper when I first noticed how deteriorated it had become. This past year I didn't even let them see the cake I baked for fear they couldn't resist. Post holiday, I usually seem to forget about the worsening condition of the pan as it isn't used often and there's always so much to draw my attention away to more pressing needs. But, I've been on a renewal of kitchen goods craze lately.  Getting a new Bundt pan before the next holiday season was on my to-do list. The age of the internet has certainly changed my ability to shop from Japan, that's for sure! My old pan was something I brought back from a trip to the States decades ago. The fluted cake pan I've been using wasn't actually even an official "Bundt" pan, I now understand, because that's a trademark name. Well, I must have known the finer points on that that at some point in time, or maybe not. I mistakenly thought all pans in that shape are a bundt cake pan. Nope, apparently they are called a fluted cake pan, or something along those lines. But, hey, thanks to Amazon.com and other sources, it's easy enough to just order a new cake pan online so I don't have to wait for a trip home. I spent ages online looking at the various designs and weighed the merits for or against purchasing an actual German bundkuchen or gugelhupf cake pan or the American Bundt pan. Finally, I decided on the original Bundt design made by Nordic Ware. It's nostalgic for me and my memories of home, after all.

Bundt cake mixes were all the rage in my final decade in the States. Apparently, the mixes are no longer sold though. How sad is that?! Now I've learned those mixes were being created between a tie-up with Pillsbury and Nordic Ware, the producer of Bundt cake pans. Both companies are located in Minnesota. Apparently, the Bundt cake is their state cake! Hmmm... I wonder if my state has a designated cake...


Next, to test it out... I looked online and found a recipe for lemon zucchini cake. I had plenty of zucchini as it's finally made its way into something Japanese farmers have figured out how to grow in this climate. I spent ages grating the zucchini and lemon, and juicing a couple of lemons. I followed the recipe religiously and baked according to the directions. The toothpick test came out clean. On to the counter to wait the 10 minutes before releasing it onto a rack to cool down. Next thing I knew the cake had collapsed! Huh?! Well, it was my first time with this recipe so maybe that was supposed to happen. The cake rocketed out of the new pan when it was time to invert it, though. Wow, what an improvement over my old pan! I waited the required time to drizzle the glaze. Next time I think I will need to drizzle any glaze before putting it on the plate, though. 

Finally, time for a coffee break and a sample of the freshly baked cake. Oh, that's one of the joys of a Bundt cake. Yes, you can cut and sample before serving it or carrying it to a potluck! It just looks better displayed cut too! 


Well, I had read that the cake would come out soft but it was ridiculously soft looking. Next, to taste. Bleh!!!! What?! It mainly had a taste of EGGS! What happened to the delicate fragrance and taste of lemon?! Yikes, it seemed under-cooked too! How to save  most of a day's labor, the price of all those ingredients, and the gas to cook it?! Back to the internet for ideas...


From what I read online, turning it into bread pudding wouldn't work as apparently that needs somewhat dried bread to absorb the eggs and milk.  I didn't find a clear answer on what to do. Sometimes a cake can be re-baked for a bit but sometimes it's a candidate for the trash bin. I ended up scraping off the glaze as I worried that would burn. Then, I sliced the whole thing and laid the pieces side-ways onto cooking paper and back in the oven they went. Hey, if it works for biscotti, it might work for a cake too...  I set the temperature for the same as it baked at and checked every 5 to 10 minutes, turned the pieces over and over again until it looked baked through. 


It wasn't as pretty the second time on the plate but fortunately my husband didn't know the headaches I'd had with the cake. He declared it the best one ever so I let him eat and eat to his heart's content. Me, heck, that recipe went in the trash. I'll never make it again! LOL


Monday, June 13, 2016

For the love of Corning

Rush, rush, rush... Well, 2 years have passed by and I haven't given this blog much thought! The time to just sit, reflect, and leisurely sit down to write more than a pressing email never seems to open up in the mad dash to get everything done in the day -- especially with our current family dynamics. 

The past year has seen me spending lots of time in the kitchen and attempting to make healthy food for my extended family. One of our kids boomeranged back with 2 kids in tow. Suddenly, the need to child-proof our home cropped up again. Once again, I needed to think about food safety too and what that means with young children in the home. We are no longer former empty-nesters back together with family 24/7, but now our grand-kids have weekly sleepovers and sick-day visits. I've probably made more waffles and pancakes in the past year-and-a-half for them than I had in the past decade total! The casserole dish I was given as a wedding present back in 1981 was once again getting a lot of use as I tried out casserole recipes to find just what my granddaughters liked. I discovered that they loved cutting, mixing, and stirring the ingredients for bread pudding. Oh, and they really loved eating it too! So my freezer was filling up with left-over bread for the next round of baking. But, one evening, in the mad rush to get the dinner on the table, the casserole was bumped, slipped off of the counter, and shattered. Oh no, where could I get another? Japanese cuisine isn't heavy on baked foods and definitely not on the kind of casserole recipes that call for a can of soup of this and a soup packet of that. Many homes here don't even have an oven! So finding another baking dish would be a problem with my limited shopping choices. I looked here and there but couldn't find anything to replace it. So, in this more modern era, I turned to the internet to order something new.

Not ever really having thought about buying a casserole dish in the past decades, I discovered there were so many choices and designs that I'd never seen before than that old Cornflower blue CorningWare (or Corning Ware) casserole that everyone in my generation knows so well. I got a major shock when I learned that Corning of New York was no longer in business and had been sold out to World Kitchen Incorporated, located in Rosemont, Illinois! Not only that, but it happened years ago -- at the turn of the 21st century in fact! The old formula for the nearly indestructible pyroceram that came on the market in  1958 was just too good  or perhaps lifestyles had changed and people were no longer were making the same sorts of recipes they once did. By the mid-1990s, the market was saturated and the company was struggling to survive it seems. They were churning out one design after another in what sounds like a frantic struggle to survive and re-captivate cooks with their amazing products. Also, business dealings led to diversification into things besides cookware and dishes. Business problems in different sectors of the company also fueled the bankruptcy. How sad is that? An ingenious revered American brand, discovered during the space age in a mistake during the process of making missile head tiles, gone with the changing times. 

As I read more online, I learned that the new owners of the company had changed the classic CorningWare pyroceram (freezer-to-stove top, oven safe, or microwave safe) to stoneware and many people online were complaining about their brand new casseroles, produced by the new company, shattering in the oven while baking dinner or easily breaking in other strange circumstances that would have been unthinkable to the old CorningWare that people in my generation grew up with. I also read that the formula for Pyrex had been changed to something that is now much more breakable. (The old Corning Pyrex is written as PYREX while the new formula put out by World Kitchen is written in lower case letters as pyrex, just in case you want to check which type you have in your own kitchen.) I saw a lot of recommendations to buy the vintage product instead.

Hmmm.... new or old, new or old? The new designs of casseroles certainly are attractive with large wide handles, pyrex now has "easy grab" handles, but these new designs seemed just too large and randomly-shaped to easily store in my limited cabinet space. I'm not opposed to using second hand goods that still have life in them. The old CorningWare was always a "green" choice, it's eco-friendly and safe from threats of leaching hazards. It is definitely BPA-free too. I decided to look at vintage products too and compare which would best meet my needs.  I needed to sit down and think about what I wanted in a "new" baking dish. First off, that white pyroceram casserole that I'd been using for nearly 35 years had been the bane of my life when it came to getting it clean. Decades of stubborn baked on gunk hid in the deepest tiniest recesses. My casserole wasn't actually sold as CorningWare but rather something that seemed nearly identical but it was made in Japan. Sadly, I didn't really take note of the manufacturer as I wasn't yet obsessed with casserole dishes. It might have been Iwaki, which long had a tie-up with Corning here in Japan. Although I'm a big fan of blue and white chinaware, I was never as enamored with the plain old blue and white Cornflower CorningWare so I didn't really want that pattern as a replacement.


Thirty-tree year old casserole on the upper left.


I came across the Symphony pattern online. It was a rare and very short-lived line of beige casseroles and dishes with a gentle floral pattern. Great, something that wouldn't always appear dirty and look nice on the table! The old Corning made many styles of casseroles but only produced 2 beige-toned patterns. They were Symphony and Forever Yours. They were both released in 1990 and sold until about 1994. It's a pity they didn't make more patterns in beige.


As soon as I'd ordered the Symphony casserole, I discovered there had also been a whole line of Callaway casseroles in French White! Wow! I'd missed the whole French White line of Corning during my years in Japan. But, when I discovered those, it was instant love! Elegant, sophisticated, and best of all, my everyday Western dishes just happened to be Callaway!  These casseroles were only on the market for a mere 2 years between 1998 to 2000. They were made during the final days of the old Corning company as we knew and loved it. It seems that World Kitchen does still sell the French White line but now the pieces have handles and probably are made of stoneware. I had worried about removing the baking dish from the oven without handles but it's never been a problem as the ridges are fine for gripping.


To the left are 2 pyroceram ramekins made by Narumi of Japan that I've had for several decades. To the right is the 2.8-liter French White Callaway roasting dish. 


Why stop at just one? After I discovered how beautiful the first one was, I was then able to locate some new-old stock that had never been opened! I worried the 1-liter size might be too small but it actually gets use as a serving bowl and for fresh pickles that steep in vinegar. Most casserole recipes that I use call for a 2-liter (2-quart) sized dish. All 3 sizes are good for their various needs.


Well, next I discovered that the very first CorningWare casserole came out when I was a baby in 1958! No wonder I've always known it! Online, I was able to find a first edition that was still in it's original box, that was billed as a "skillet", and had a detachable handle, and a trivet. It also had a pyroceram lid just like the standard casserole. How cool is that? Wow, that lid really makes the piece as far as I'm concerned. Maybe they decided they'd never sell any more pieces once everyone owned a nearly indestructible dish AND lid? Certainly, the first thing to bite the dust decades before my first pyroceram piece broke was the glass lid.

So, then I had FIVE casseroles in various sizes while I'd spent more than 3 decades using just one! There's nothing like telling you that you can no longer get something to make you rush out and grab everything in sight!


Well, it seems like you can't read about the downfall of Corning without also reading about the boom in a younger generation going wild over vintage PYREX. I was scratching my head over that, at first! That hideous old stuff that every household had a piece or 2 of in their kitchen when I was a kid? I'm sure I must have broken more than one Cinderella mixing bowl in the tacky Amish Butterprint pattern while learning to cook as a child. Ah, but times have changed and Mid-Century is now cool! Not only that, since the stuff is "vintage" and fairly easy to find on the cheap second-hand, people are collecting it as groupings of decorative art as decor rather than for the functional use it was first intended for. It's come out from the deep recesses of the cupboard to be displayed in pride of place. As the old folks would say, while shaking their heads, when I was a kid, "Wonders never cease."! But, pictures I've seen online really do look attractive with so many pieces grouped together and color coordinated.

Maybe I shouldn't let this fad pass me by, I reasoned. The Snowflake pattern caught my eye online. I don't recall ever having seen that pattern at any potluck in my childhood. But it is very pretty and snowflakes are always classic. I was amazed to read it came on to the market at the time I was born during the Christmas season of 1956. So we were both in the oven at the same time, so to speak! The charcoal version was the shortest lived and retired in 1960, the turquoise on a white background in 1963, and the white on turquoise background in 1967. Along with the Pink Daisy pattern, they were the first printed patterns on the opal line of PYREX. I was saved from the Pyrex buying bug though just because I just don't have much storage or display space in my very tiny Japanese kitchen. But, learning the history around this particular pattern and having 2 granddaughters, I decided to buy 2 pieces to hopefully pass on to them someday. 


1950s turquoise Pyrex gets a new life for the Frozen generation!


Well, the third product you think of when you hear "Corning" is Corelle. In 1976, I told my mother I had decided to get married. Besides arguing that I was making a mistake and should wait, she promptly went out and purchased a set of Old Town-Blue Onion Corelle for me. That relationship didn't last, heck it didn't even get as far as the wedding, but 40 years later most of that set is still around. For the record, I really, really hated that pattern too. But, some years later, when I actually did get married, I brought it to Japan with me. Something about it just never attracted me so I was happy to fob most it off on my daughter when she left home and needed a starter set of dishes. 


Christmas 1989


Birthday 2015
I've read online that some 2,000 patterns of Corelle have been released since it was first launched in 1970! 

The first Corelle I ever spotted in Japan is a pattern that was most likely never released in the USA. Replacements.com lists it in their unknown patterns as COR 143. I was only able to buy 3 soup bowls in this pattern as that was all that was in stock in the store I purchased them at and they were sold individually. They've seen a lot of use over the past twenty-some years, though. 


In 1995, I made a trip to the USA and found the brand-new Callaway pattern in a store and purchased several pieces. I think I added a few extra pieces to expand the set on my next trip to the States in 1997. The pattern looks nice in all seasons and the light swirls and ripples make it look so much more elegant and suitable to use along with real bone china than the stodgy original Corelle ever did. I also have several Japanese everyday dishes that look nice together with Callaway.


Callaway pattern


Well the buying spree continued. Although I already had my original Old Town-Blue Onion platter and a Callaway platter, I decided to add in a Forever Yours platter. 


Although the online seller described this Forever Yours platter as having normal light utensil marks it actually looked like the previous owners must have carved roasts on it several times a week over the past 25 years!  Rustling up some white lacy paper seemed to do the trick in making it look OK.


The more Corelle patterns that I viewed online the more patterns I saw that I wanted! I was completely addicted! I saw Holly Rim and wanted one large 10-inch dinner plate in that pattern too as it would mix and match well with a holiday serving plate I already owned. Holly Rim was a pattern sold between 2006 to 2008 by World Kitchen. It's such a whimsical carefree pattern that I look forward to using and was surprised that it had such a short lived time on the shelf.


Oh, I shouldn't be greedy, I reasoned. My daughter has a summer birthday, she loves sunflowers and checked patterns. Sunsations would be perfect for her, I thought! It sold for only 1 year between 1996 to 1997. I found some sellers online and picked out 2 different sized plates for her. Sadly, when the first 2 plates arrived from the first seller they showed very heavy utensil use and I didn't feel right about giving her something that was so obviously second-hand. Actually, I think the overall design appealed more to my American tastes than it would to her Japanese ones. Anyway, the pattern makes me so sunny and happy so I ended up keeping it and find it's perfect for cheerful breakfasts!


Do I dare admit that the buying frenzy continued? Corelle is in some ways perfect for a tiny Japanese home. It is so slim that it stacks away neatly, using little of one's precious shelf space. One plate placed over one dish makes refrigerator storage easy so I don't need masses of Tupperware or other space taking plastic storage containers. I've always considered it my insurance plan for when we have the next Big One so we'll hopefully still have something to eat from. There's just one big problem... Well, maybe more than one. But, one thing is design. Japan is a food culture. Food here is not randomly mounded onto one 10-inch dinner plate. Instead, each serving of food is artfully placed in it's own individual serving dish or plate. For each meal, we might have 1 soup bowl, 1 rice bowl, 1 small plate for fish, a couple of small plates for vegetables or tofu... Yes, we easily use 5 or 6 dishes, per person, per meal! Not everything is in the exact same pattern and there might be a mixture of wood, chinaware, stoneware, and so on. So, that was part of my problem with the Old Town-Blue Onion original Corelle pattern. It just didn't look attractive when serving Japanese food and the blue printed pattern just looked odd mixed with handmade ceramic or china pieces. 

So, dare I admit that just when I thought I'd spent way too much money on casseroles and table dishes that we didn't urgently need, I discovered a Corelle pattern that perfectly suited my everyday Japanese dishes! Behold, Botanique! World Kitchen came out with the pattern between 2007 to 2009. The indigo blue on white could easily pass for something created and fired in a kiln here in Japan! Quality control doesn't seem quite as good on these plates as on the vintage Corelle, though. Between the 4 bread plate sized pieces I now own in Botanique, there are variations in color tone, placement of pattern, and other slight imperfections that I never saw on the older ones. But that actually suits this particular design so I won't quibble. 


Really, that should have been the end of this addiction. My cupboard space is seriously limited, after all. But, then one day, I happened upon a Corelle pattern being sold in a local Do It Yourself home center store. What, Corelle here in my little town in Japan? I rarely ever see Corelle here and I know only one store some distance from home that usually has a couple of divided Corelle plates or Winter White serving bowls in stock. But here was a full patterned set in a variety of sizes being sold individually! Oh, come on, it's such a rare event to see this here and I can always make use of some more mini-mini sized plates. Yes, if only they'd been in Botanique indigo blue and white they would have been perfect! But, I loaded my shopping basket with a few, and then put them back on the shelf as being a frivolous purchase, but in the end I walked out of that store carrying some Sweet Strawberry Corelle. It's a pattern that's sold only here in Japan. These were much pricier than the vintage Corelle I've been buying up online but I didn't have to pay for shipping so it worked out about the same in price. Hopefully, this really is the end. Who would have ever thought that breaking one ugly old casserole would have ended up like this?!


P.S. Of course you know I have no affiliation to either the Corning or World Kitchen companies. I just love dishes!